Install
SlotDesk installs through a browser wizard. There is nothing to run on the command line, and no
.env file to edit by hand: the wizard writes it for you.
Work through Before you start first. The wizard asks for your database credentials, your public URL and your CodeCanyon purchase code, and it is easier to have all three in front of you than to go looking mid-install.
What you are about to do
Two phases, and the progress counter only tracks the first one.
| Phase | Screens | Counter | What it does |
|---|---|---|---|
| Install | Requirements · Database · App details · Owner account | Setup 1/4 to 4/4 | Configures the application and builds the database |
| Business setup | Business type · Services · Team · Done | No counter | Creates your first business and preloads it |
The second phase can be skipped and redone later from inside the panel. The first cannot.
Budget about ten minutes, plus however long your upload takes.
Before the wizard: upload and point the web server
This is the only step you do yourself.
- Unzip the package and upload its contents to your server.
- Point your domain's document root at the
public/directory, not at the folder above it. - Open your domain in a browser.
If the document root is wrong you will either see a directory listing or a page of PHP source. That is the symptom of this one step. Check it before you assume anything else is broken.
If SlotDesk is not installed yet, opening the site sends you to the installer automatically.
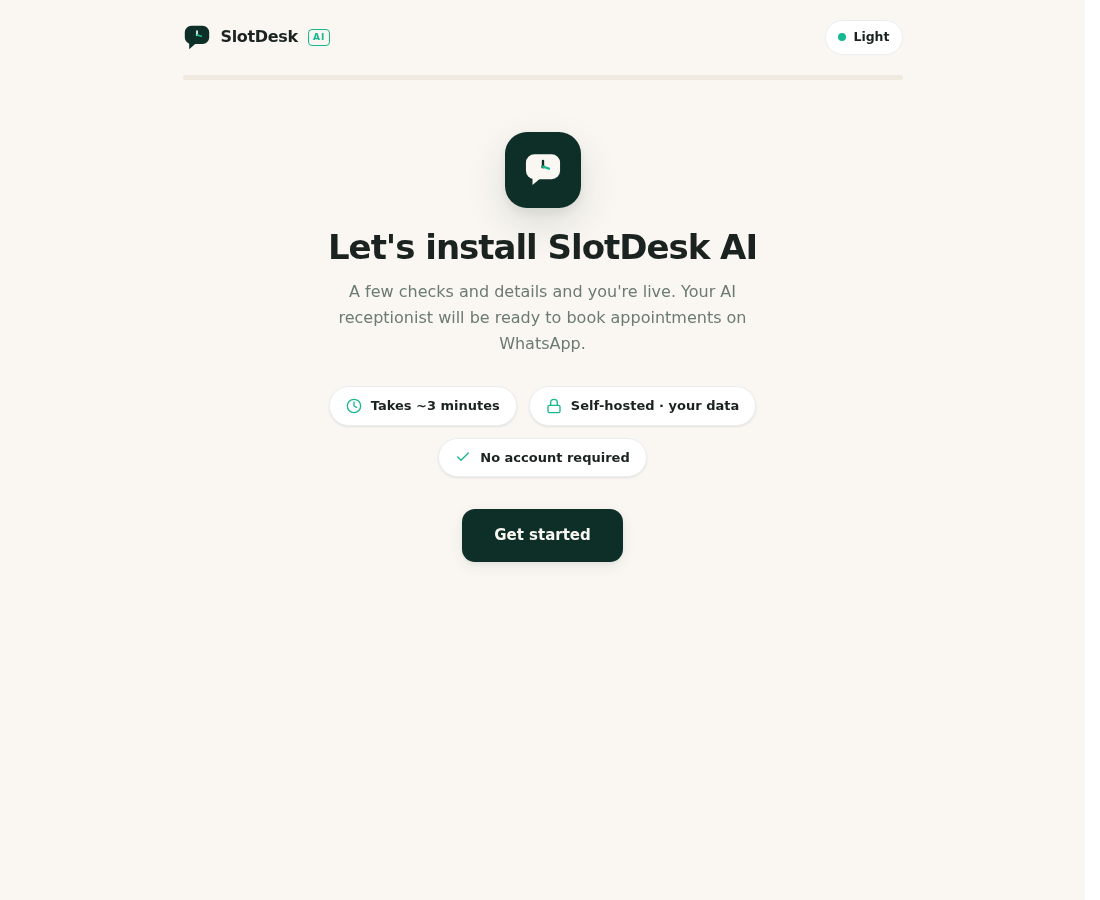 The installer's welcome screen.
Step 1 of 4 · Server requirements
Every requirement from the previous chapter, checked against the server you are actually on. Each row shows what is needed and what it found.
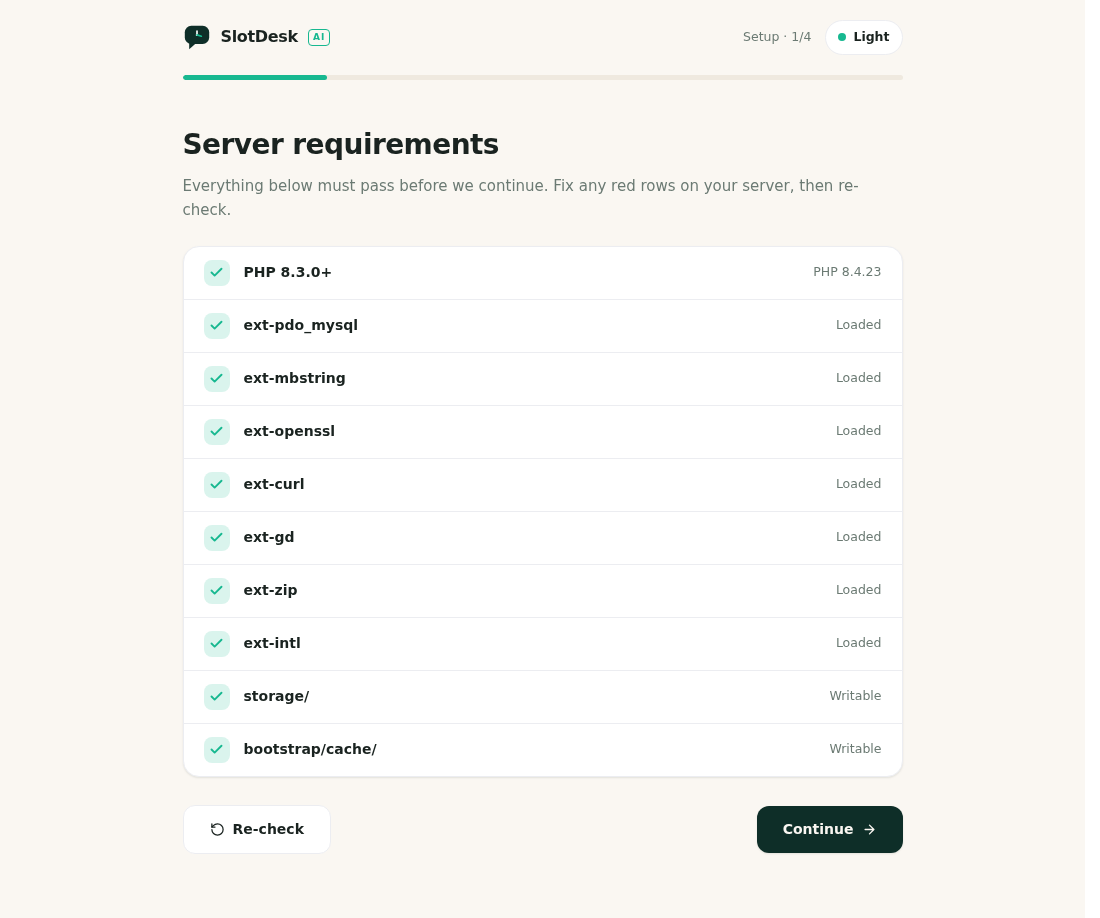 Requirements, with every row passing.
If a row fails, fix it on the server and press Re-check. You do not need to restart the wizard.
The two most common failures:
- A missing extension. Install it through your host's PHP settings or your package manager, then re-check. On cPanel this is usually under "Select PHP Version".
storage/orbootstrap/cache/not writable. Your web server user needs write access to both. Fixing permissions on the parent directory alone is not enough.
You cannot continue until everything passes, which is deliberate: every one of these is needed later, and finding out at that point is worse.
Step 2 of 4 · Connect your database
Create an empty MySQL or MariaDB database on your server first, then enter its details here.
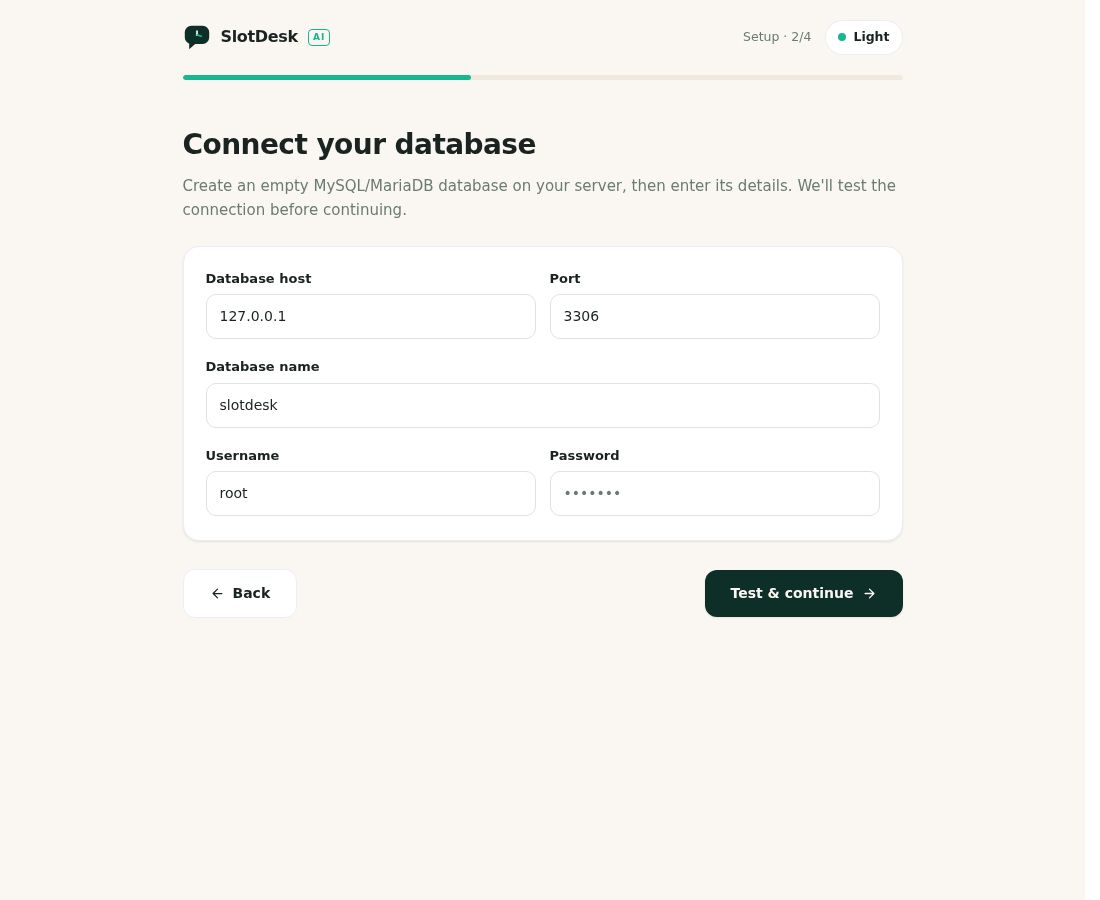 The database step.
| Field | Note |
|---|---|
| Database host | Usually 127.0.0.1 or localhost. Some hosts use a separate database server address. |
| Port | 3306 unless your host says otherwise |
| Database name | The empty database you created |
| Username, Password | The user with access to it |
Test and continue opens a real connection before it moves on. If the credentials are wrong you stay on this screen with an explanation, rather than failing three steps later. Nothing is written to the database yet at this point.
Step 3 of 4 · App details
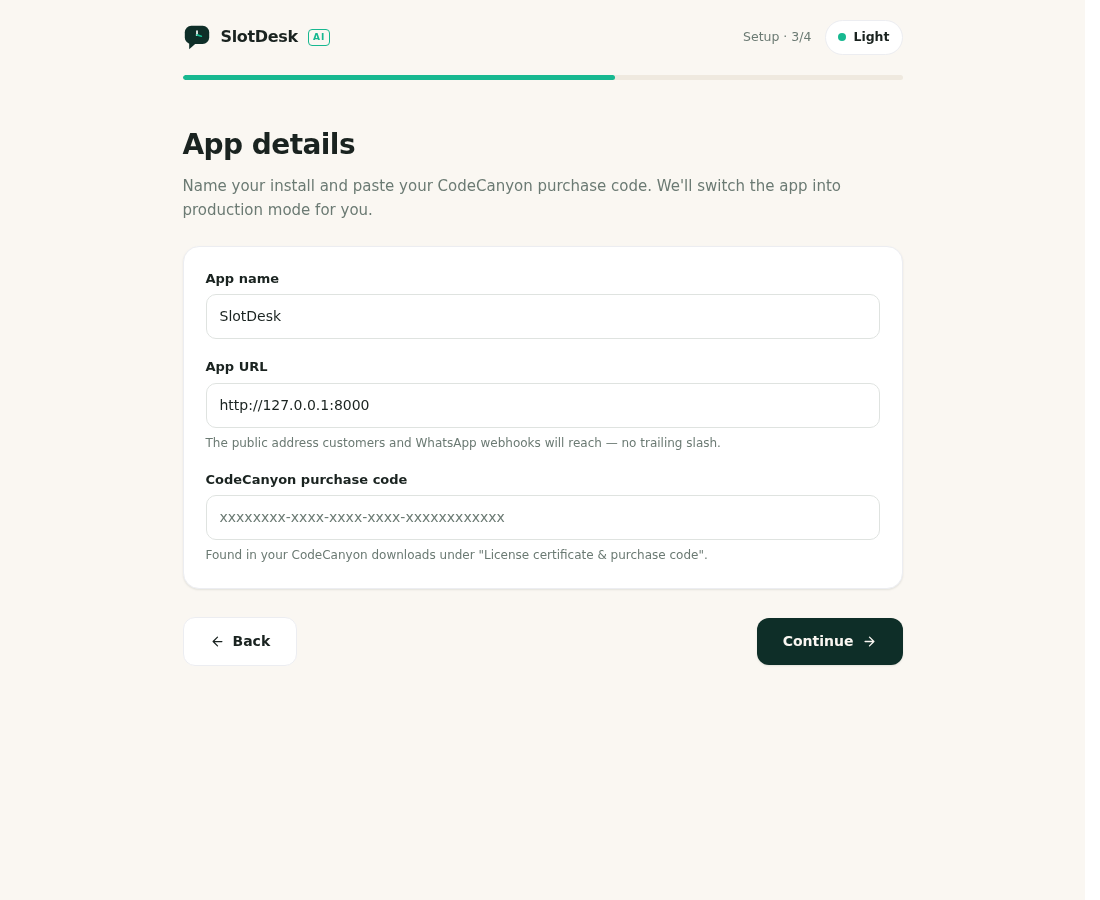 App details.
App name is what appears in the panel and in outgoing email. You can change it later.
App URL is the one to get right. It is the public address that customers and WhatsApp webhooks will reach, and it must be:
- the full address including
https:// - the real public domain, not
localhostand not an IP - without a trailing slash
Meta will not deliver webhooks to a URL that is not reachable over HTTPS with a valid certificate, so if TLS is not set up yet, set it up before you finish this screen. Getting it wrong here means WhatsApp verification fails later with an error that points at Meta rather than at this field.
CodeCanyon purchase code is in your CodeCanyon downloads under "License certificate and purchase code". Entering it switches the install into production mode.
Step 4 of 4 · Create the owner account
This is the super-admin login for /admin, the panel that owns the whole install rather than one
business.
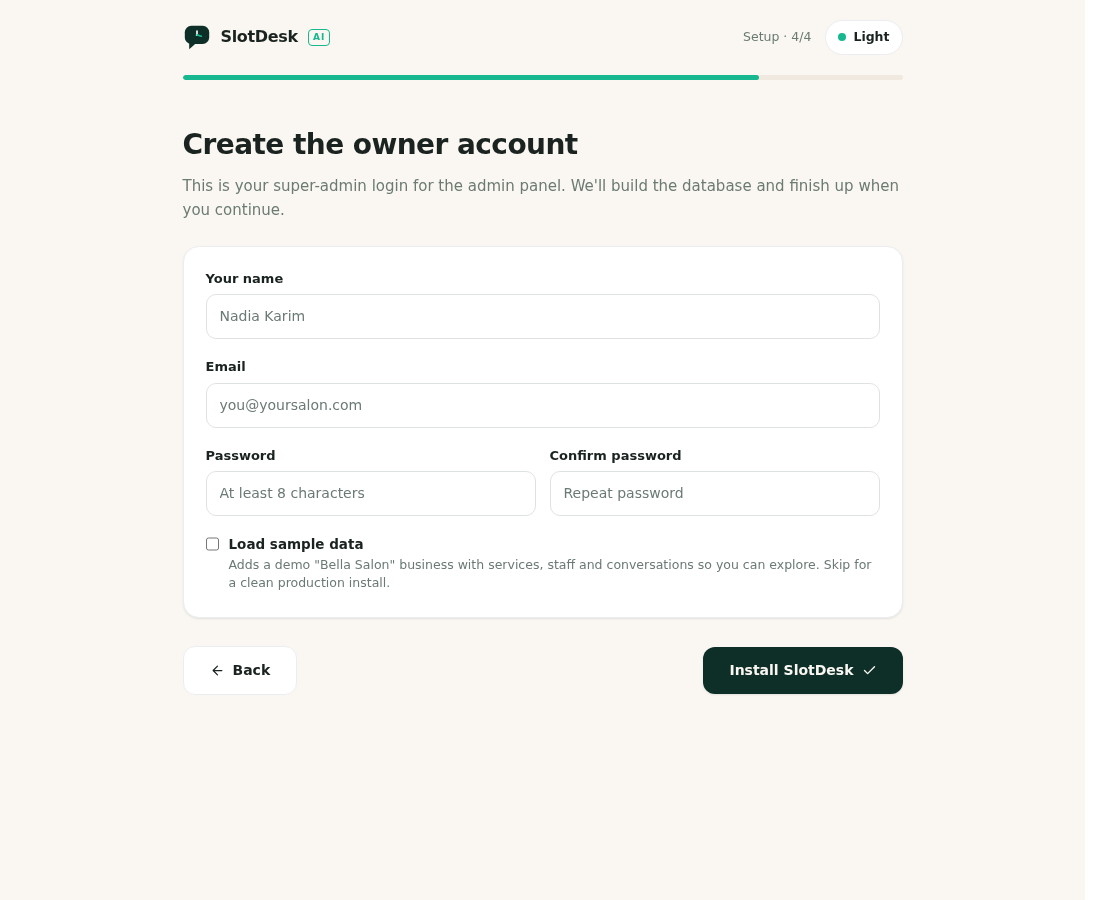 The owner account step, with the sample-data option.
Name, email and a password of at least eight characters, confirmed.
The sample data checkbox
Load sample data adds a demo "Bella Salon" business with services, staff and conversations so you can look around a populated app instead of an empty one.
Leave it unchecked for a production install. It is genuinely useful for evaluating SlotDesk and genuinely awkward to unpick once real bookings are mixed in with demo ones.
Pressing Install SlotDesk builds the database. This is the point of no return for the first phase, and it is the step that takes longest.
Business setup
From here the wizard sets up your first business. Every screen has a Skip setup link, and everything it does can be done later from the panel, so skipping costs you nothing except doing it by hand afterwards.
What kind of business is this
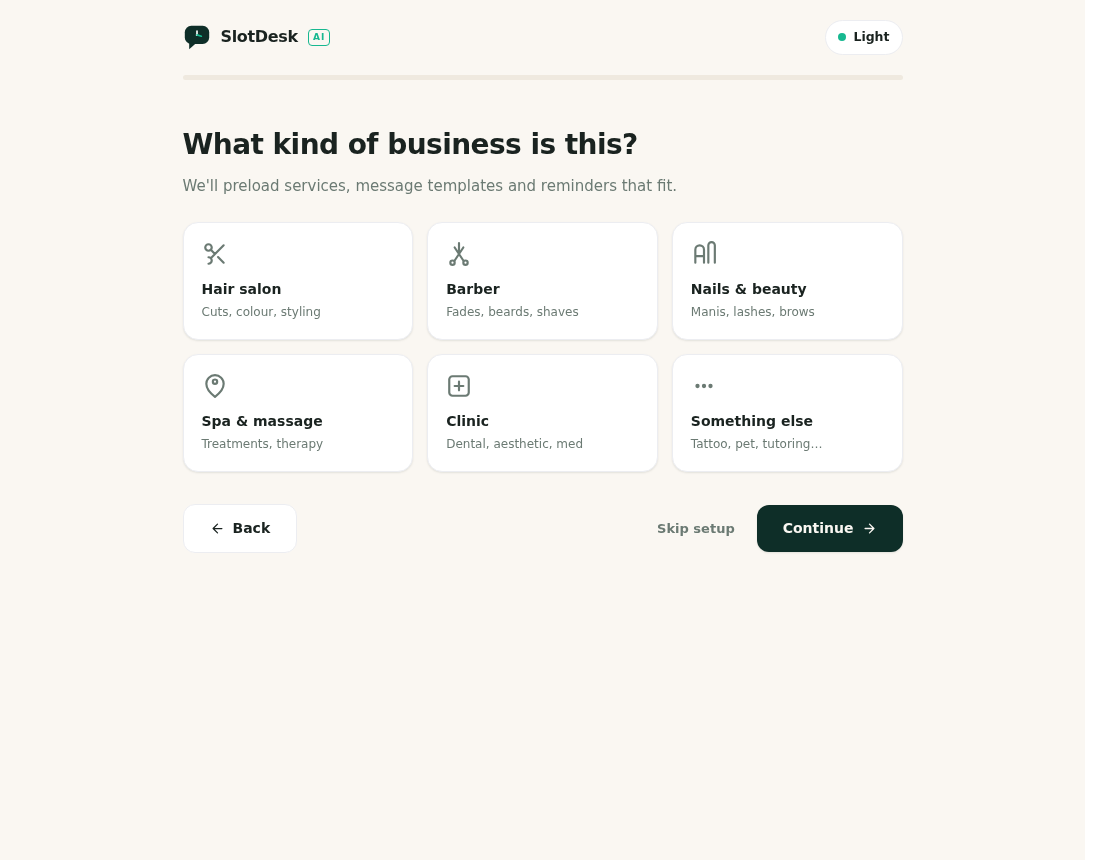 Choosing a business type.
Six choices: hair salon, barber, nails and beauty, spa and massage, clinic, or something else. The choice preloads services, message templates and reminders that suit that trade. It is a starting point, not a category you are locked into.
This screen also takes your business name, timezone and currency. The timezone matters more than it looks: every availability rule, reminder and booking window is calculated in it.
Confirm your services
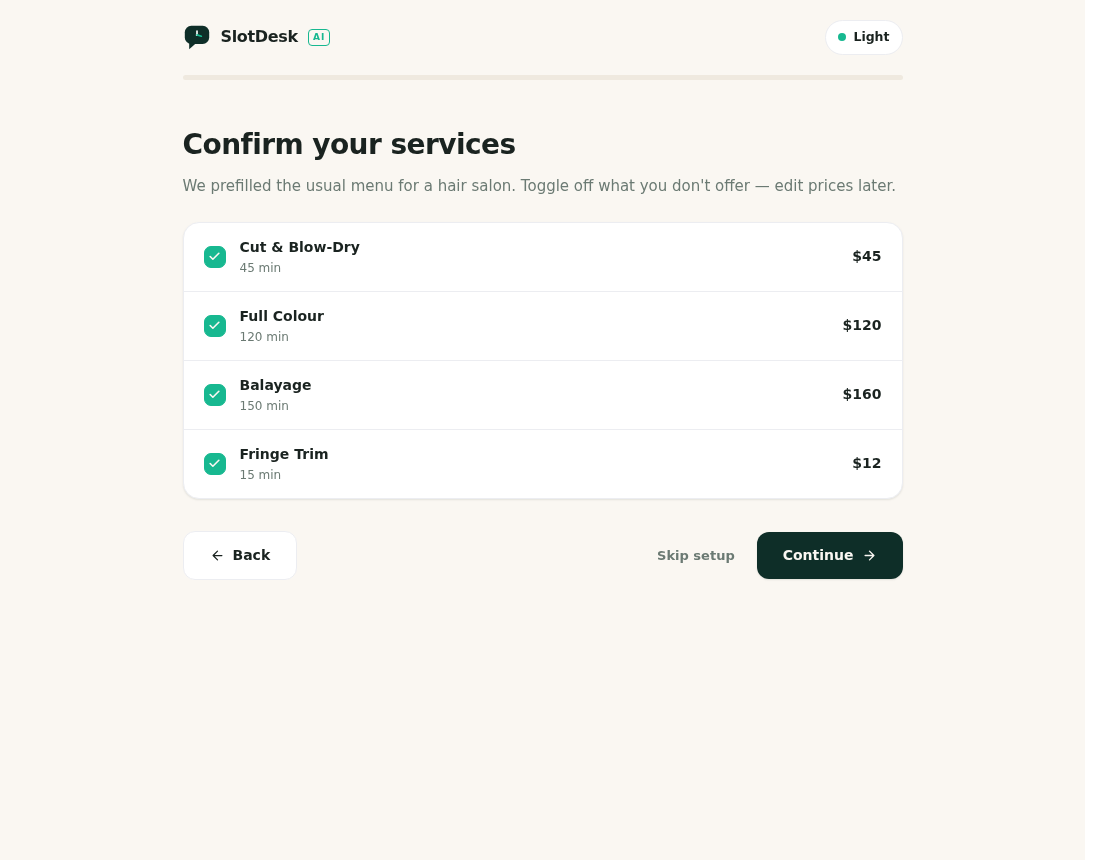 Prefilled services for a hair salon.
A prefilled menu based on the type you chose, each with a duration and a price. Toggle off anything you do not offer. Durations and prices are editable later under Catalog, so approximate is fine here.
Who is on the team
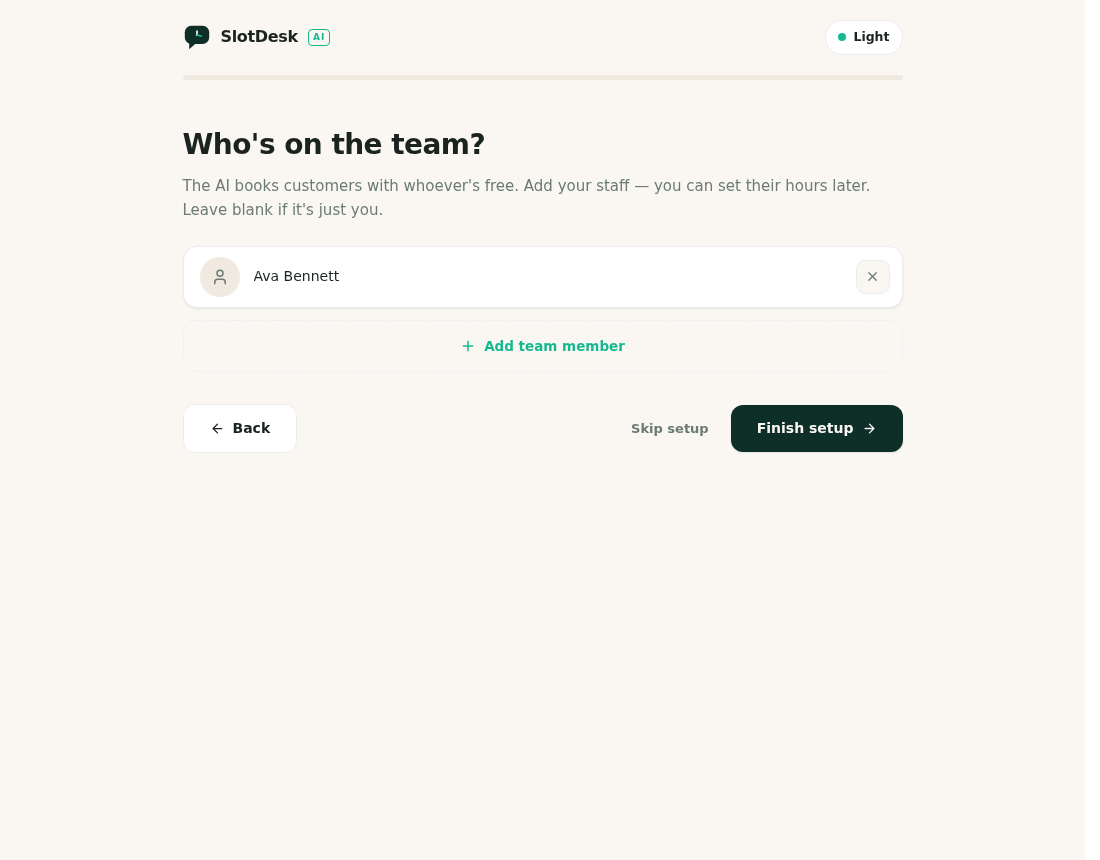 Adding staff.
Add the people who perform the services. Working hours come later, under Team. Leave it blank if it is just you.
Note that these are staff, the people appointments are booked with. They are not panel logins. The Staff and team chapter covers the difference, and it catches people out.
You are all set
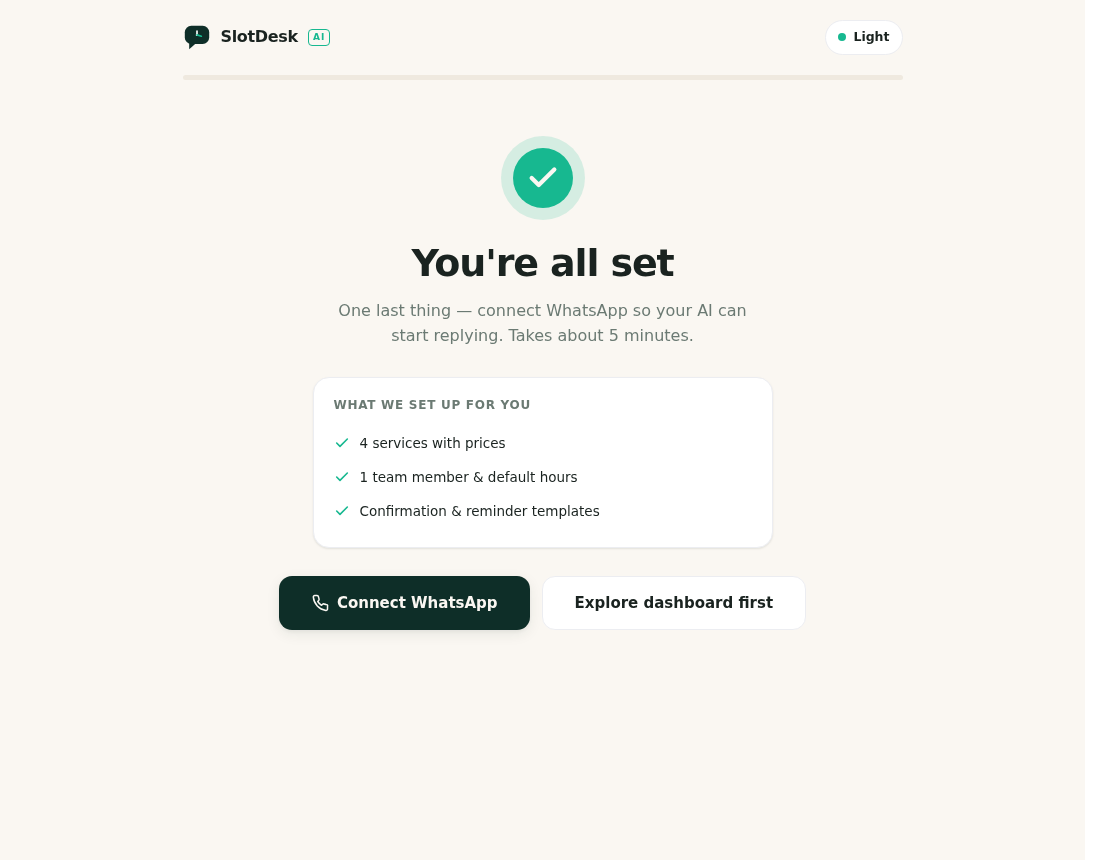 The finished install.
A summary of what was created, and two ways on: Connect WhatsApp, which goes straight to the setup wizard, or Explore dashboard first.
What is working now, and what is not
Installed and ready:
- Both panels,
/adminand/app - Your first business, with its services and staff
- Confirmation and reminder templates
- The database, fully built
Not yet working:
- Nothing sends. Cron and the queue worker are not set up, so no reminder, confirmation or AI reply will go out. The panel will look completely normal while this is true. That is the next chapter, and it is the next thing to do.
- WhatsApp is not connected. No number, no webhook. That is the WhatsApp Cloud API chapter.
- The AI receptionist has no provider key, so it cannot answer anything.
- Payments are not configured.
Do Cron and the queue worker next, even though the app appears finished. The order matters: if you connect WhatsApp before the queue worker is running, the webhook will verify and then messages will sit in a queue nothing is draining, and the symptom looks exactly like a broken WhatsApp connection.
If something went wrong
The installer will not load, or the site shows a directory listing.
The document root is not on public/. See the top of this chapter.
A requirement will not pass even after fixing it.
Some hosts run a different PHP version for the web server than for the command line. Check the
version the requirements screen reports, not the one php -v gives you over SSH.
The database step rejects correct credentials.
Confirm the user has privileges on that specific database, and that the host is what your provider
says rather than what you assume. Some managed hosts do not accept localhost and need 127.0.0.1,
or the reverse.
The install finished but you cannot log in.
Use the owner email and password from step 4 at /admin. If the password reset email does not
arrive, that is the mail configuration from the previous chapter, which defaults to writing to a log
file rather than
sending.
Previous: Before you start Next: Cron and the queue worker, the two lines that make it actually work.